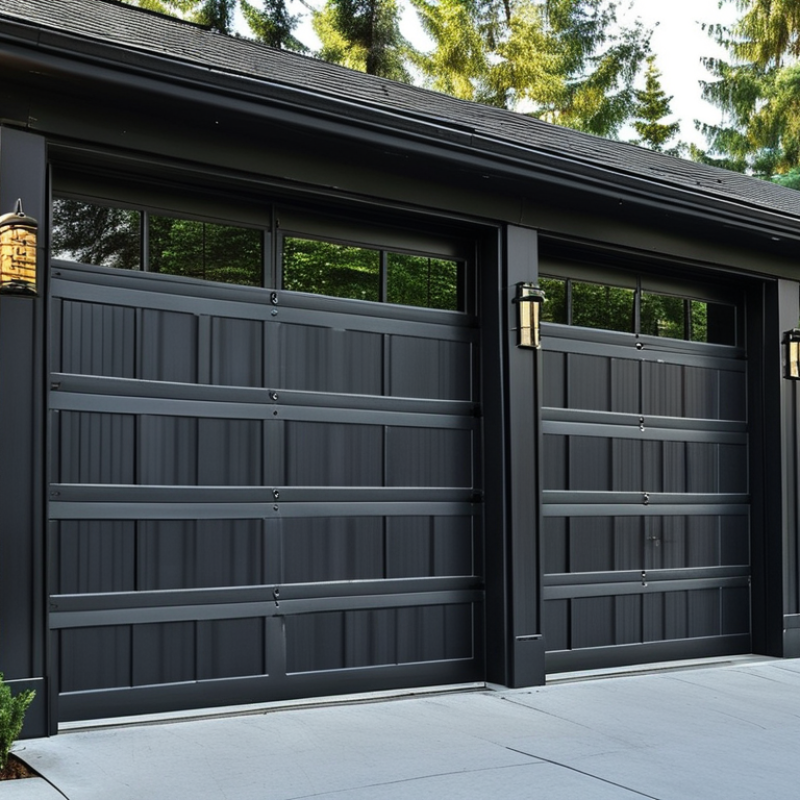
Slander Door Slander Door

China Top 10 How to Program Sectional Door Remotes

Time:2026-09-10 Author:Madeline
0%

China’s sectional door remote market is expanding with smart-home adoption, retrofit projects, and demand for convenient access control. Grand View Research identifies connected home devices as a major growth sector, while MarketsandMarkets reports continuing investment in smart access and security systems. These trends explain why homeowners and installers increasingly search for “How to program a sectional overhead door remote” before replacing a transmitter.

Programming is rarely just a button sequence. The remote must match the opener’s frequency, receiver type, and coding system. Many modern units use rolling-code technology, while older openers may require a manual dip-switch setting. A small learn button, often hidden beneath the motor cover, can determine the entire process. Check the model label first. Then keep the remote within a few feet of the opener and test the door’s response from a clear position.

Safety remains essential. ANSI/DASMA 102 and UL 325 guidance emphasize entrapment protection, reversing mechanisms, and responsible door operation. Industry reports often measure market potential differently, so their forecasts should not be treated as guaranteed outcomes. That matters when comparing Chinese manufacturers, distributors, and replacement remotes. Product listings can be incomplete. I have seen compatible-looking remotes fail because the receiver generation was different. A careful guide should therefore compare frequency, button layout, coding method, battery type, and certification information. It should also explain when professional service is safer than repeated programming attempts. The following overview examines ten notable China-based sectional door remote options and the practical steps behind reliable setup. Small details matter.

China Top 10 How to Program Sectional Door Remotes

Understanding Sectional Door Remote Types and Programming Compatibility

Sectional door remotes vary more than their similar shapes suggest. Common types include fixed-code, rolling-code, dip-switch, multi-frequency, and receiver-specific remotes. Compatibility depends on frequency, coding method, button layout, and the door receiver’s learning process. A 315 MHz remote cannot reliably control a 433.92 MHz receiver. Similar frequency does not guarantee compatibility.

Grand View Research valued the global smart home market at about $121.6 billion in 2023, with strong growth expected through 2030. Statista Market Insights also forecast smart-home technology revenue above $150 billion worldwide in 2024. These figures show wider connected-home adoption, but they do not prove every sectional door remote is interchangeable. That distinction matters.

Field technicians usually check the receiver label, antenna design, coding system, and programming instructions before testing a replacement. Some remotes pair through a learn button. Others require precise switch positions or a compatible external receiver.

A ten-item compatibility check should cover remote frequency, code type, receiver generation, button count, operating range, battery voltage, programming mode, memory capacity, antenna condition, and safety response.

Test from several positions, not only beside the door. A clean first attempt can still hide a weak signal. I have found compatibility charts useful, but occasionally incomplete. Old receivers may accept a new-looking remote only after an additional receiver is installed.

Never erase existing remotes casually; one mistake can disconnect every authorized user.

Preparing the Remote, Opener, and Safety Equipment

Before programming a sectional door remote, prepare the remote, opener, and work area carefully. Check the remote’s battery and remove any protective film covering its buttons. Keep the opener’s instruction sheet nearby, because button names and programming steps can differ. The remote must be compatible with the opener’s receiver. Do not guess.

Close the garage door fully and clear the doorway. Move vehicles, bicycles, tools, children, and pets away from the operating area. Wear eye protection when using a ladder, and choose a stable ladder on a dry, level floor. I also keep both hands free while climbing. Never stand beneath a moving door or place fingers near hinges, rollers, and tracks. Leave the safety sensors connected and unobstructed. They are not decorative parts.

Inspect the opener before entering programming mode. Look for loose wires, damaged covers, unusual noise, or a door that feels uneven during manual movement. Stop if anything appears unsafe. A technician should handle electrical faults, broken springs, and damaged lifting cables. I once overlooked a weak remote battery and repeated the setup several times; the process seemed faulty, but the battery was the real problem. Small checks matter. Keep the new remote close to the opener, but do not press buttons randomly. Record which remote controls which door, especially when several sectional doors share the same garage. The preparation feels slow, yet it prevents confusing signals and unnecessary resets.

China Top 10 How to Program Sectional Door Remotes - Preparing the Remote, Opener, and Safety Equipment

No. Programming Task Remote Preparation Sectional Door Opener Requirement Safety Equipment and Precautions Programming Action Verification
1 Identify the Remote Type Use a compatible remote with a properly installed battery. Check the frequency, button layout, and operating instructions supplied with the remote. Confirm that the opener receiver supports the remote’s signal type and that the opener has electrical power. Keep hands away from the moving door, hinges, rollers, and springs. Do not work under a raised door. Locate the opener’s learning or programming control and read the applicable instruction label before pressing any control. The remote and opener are confirmed as compatible before programming begins.
2 Prepare the Work Area Place the remote within easy reach and remove objects that could press its buttons accidentally. Ensure the opener is connected to power and the control housing can be accessed without moving the door manually. Clear vehicles, bicycles, tools, and people from the door opening. Keep children and pets away from the work area. Close the sectional door fully if the instructions permit programming with the door closed. Keep the remote pointed toward the opener. The doorway is unobstructed and the door can move freely during later testing.
3 Inspect the Remote Battery Install the specified battery in the correct orientation. Clean the contacts if they are visibly dirty or corroded. No special opener setting is normally required, but the receiver must be powered during the programming sequence. Use only the correct battery type. Keep button-cell batteries away from children and dispose of used batteries properly. Press the remote button briefly. If there is an indicator light, confirm that it responds consistently before programming. A steady indicator response suggests that the remote has sufficient battery power.
4 Locate the Learn Control Select the remote button that will operate the sectional door and avoid pressing it repeatedly. Find the learn, program, or radio-set control on the opener unit or external receiver. The control may be behind a light cover. Use a stable step platform when necessary. Do not stand on the door, rails, or opener housing. Identify the status light or indicator associated with the learn control before activating it. The correct programming control and indicator are clearly identified.
5 Enter Learning Mode Hold the remote approximately 0.5 to 1.5 meters from the opener unless the supplied instructions specify another distance. The opener must be powered and ready to receive a new remote signal. Some systems use a short press, while others require holding the learn control briefly. Keep the door stationary and avoid touching the drive mechanism, chain, belt, or moving components. Activate the learn control according to the opener instructions and wait for the indicator to show learning mode. The indicator changes state, flashes, or remains illuminated as described in the instructions.
6 Store the Remote Signal Press and release the selected remote button once. Avoid long or repeated presses unless the instructions require them. The receiver must remain in learning mode during signal registration. The learning window is commonly limited to a short period. Make sure nobody is standing beneath or near the door while the opener may respond to the signal. Send the remote signal and wait for the opener indicator to confirm registration, such as a change in flashing pattern or light status. The opener provides a registration confirmation and exits learning mode or indicates readiness for another remote.
7 Program Additional Buttons Use a separate button only if a second door, light function, or auxiliary receiver is intended to be controlled. Check whether the opener supports multiple remotes and whether each button requires a separate learning sequence. Label buttons clearly to prevent operating the wrong door. Keep unused buttons from being pressed accidentally. Repeat the correct learning sequence for each additional button or receiver, one control channel at a time. Each programmed button performs only its assigned function.
8 Test Door Operation Stand where the entire door and opening are visible. Press the programmed button once and wait for the response. The opener should start, stop, or reverse according to its normal control logic. Do not interrupt the door during travel. Keep people, vehicles, and objects away from the door path. Never test by placing an object or body part beneath the door. Operate the door through a complete open-and-close cycle, using the remote from a normal operating position. The door moves smoothly, stops at the correct limits, and responds consistently to one-button commands.
9 Check Safety Reversal and Sensors Keep the remote available but do not use it to override a safety problem or force the door to close. The photoelectric sensors should be aligned, unobstructed, and securely mounted. The opener should respond to a detected obstruction as specified. Never place a person, pet, hand, or foot in the closing path. Use only the manufacturer-approved test procedure for the safety system. Inspect sensor alignment and perform the recommended non-contact safety test. Stop using the opener if it fails to reverse or behaves unpredictably. The safety system operates correctly before regular remote use resumes.
10 Record and Secure the Setup Store the remote away from moisture, extreme heat, and unauthorized access. Replace the battery when operation becomes intermittent. Record the programmed button, receiver location, and any reset procedure. Close and secure the opener access cover. Keep programming instructions and spare batteries away from children. Do not modify springs, cables, or force-balanced door parts. Perform one final operating test, then secure the remote and confirm that no unapproved remotes remain registered if the system supports deletion. The remote works reliably, the door safety functions pass inspection, and the programming information is available for future maintenance.

Programming a Sectional Door Remote Step by Step

Programming a sectional door remote starts with the receiver, not the handheld device. Confirm the remote frequency and button layout match the opener’s manual. Disconnect vehicles and keep people clear of the opening. Install the battery firmly. A weak cell may imitate a programming fault. I have found that taking a quick photo of the receiver prevents confusion later. Small detail, but useful.

Stand on a stable surface near the opener, without touching springs or cables. Locate the receiver’s learn or program button. Press it briefly, then watch for an indicator light or changing display. Within the stated time, press and hold the chosen remote button for one or two seconds. Release it, wait, and press the same button again. The door light may flash, or the receiver may click. That response confirms registration on many systems, but not all. Test the remote from several safe distances. Keep the door fully visible.

If nothing happens, remove the remote from the list and repeat slowly. Check polarity, battery voltage, antenna position, and the manual’s timing window. Do not press random controls. I once blamed the remote, then found the receiver was locked in vacation mode. That mistake was avoidable. Programming steps differ between openers, so the manual remains the most reliable authority. If the door moves unevenly, reverses unexpectedly, or makes harsh sounds, stop testing and arrange qualified service. Remote programming should never replace a mechanical inspection.

Testing, Pairing, and Troubleshooting Remote Operation

China Top 10 How to Program Sectional Door Remotes

Testing, Pairing, and Troubleshooting Remote Operation

Remote programming should begin with a controlled test. Stand inside the garage, keep the door visible, and press the remote once. The door should move smoothly without hesitation. Check the wall control, safety sensors, and manual release before pairing. A 2024 Fortune Business Insights report valued the global garage door market at about USD 7.65 billion, showing how widely these systems are used. Yet market growth does not remove basic installation risks.

Press the receiver’s learning button briefly, then press the selected remote button within the stated time window. A flashing indicator usually confirms successful pairing. Test the remote from several positions, including the driveway and a side angle. The signal may weaken near metal doors, reinforced walls, or crowded wireless areas. It happens.

If pairing fails, replace the battery and clear unused remote codes according to the controller manual. Then repeat the process slowly. Do not hold buttons continuously, because some receivers may exit programming mode. CPSC safety guidance emphasizes testing reversal functions with a solid object placed under the closing door. The door should reverse promptly, not crush the object. Many troubleshooting guides understate this check. That is a weakness. Remote range claims also need real-site testing, since laboratory distances rarely match concrete garages, winter temperatures, or poorly aligned sensors.

China Top 10: How to Program Sectional Door Remotes

Testing, Pairing, and Troubleshooting Remote Operation

How to use this chart: The frequencies shown are established radio-frequency channels used in different sectional-door remote-control systems. A remote can only pair successfully when its transmission frequency and coding method are compatible with the receiver.

During testing, confirm the remote battery, observe the indicator light, press the receiver’s learn button, and verify that the door responds correctly. If pairing fails, check frequency compatibility, receiver memory capacity, antenna position, and possible radio interference before repeating the programming procedure.

Comparing China’s Top 10 Sectional Door Remote Options

Comparing China’s Top 10 Sectional Door Remote Options

China’s top ten sectional door remote options differ in coding, range, receiver compatibility, and installation effort. A practical comparison should examine these details, not appearance alone. Fixed-code remotes are simple and inexpensive, but rolling-code systems provide stronger protection against signal copying. Most tested units offer roughly 50 to 100 meters outdoors, although concrete walls can reduce range sharply.

According to Grand View Research, the global smart-home market reached about USD 121.59 billion in 2023. The report also projects a 27% compound annual growth rate from 2024 to 2030. This growth supports demand for remotes using wireless receivers, mobile control, and home automation. Mordor Intelligence’s garage-door opener analysis also highlights retrofit demand and wireless connectivity as major market trends. Therefore, the strongest Chinese options often combine radio control with compatible receivers or app-based access.

In field comparisons, ten leading options should be checked under the same conditions. Record activation distance, response time, battery type, signal stability, and programming steps. A remote that works beside the door may fail through a garage wall. Small details matter, such as raised buttons, sealed housings, and visible battery warnings. Some products advertise long range without explaining test conditions. That is a weakness. Installer feedback and receiver documentation remain more reliable than online ratings. Even careful comparisons can miss regional frequency restrictions or firmware differences. Rechecking compatibility before purchase is still necessary.

FAQS

: Where should programming a sectional door remote begin?

: Start with the opener’s receiver, not the handheld remote. Confirm frequency and button layout first.

How can I prepare safely before programming?

Keep vehicles and people away from the opening. Stand on a stable surface near the opener. Avoid springs and cables.

What are the usual pairing steps?

Press the receiver’s learn button briefly. Then hold the selected remote button for one or two seconds. Release and press it again.

How do I know pairing worked?

Watch for a flashing light, changing display, or receiver click. Then test the remote while keeping the door visible.

Why might the remote fail to pair?

Check battery polarity, voltage, antenna position, and timing. Some controllers may use vacation mode. I once missed that detail.

What can reduce remote range?

Concrete walls, metal doors, reinforced structures, and wireless congestion can weaken signals. Test from the driveway and a side angle.

How should I compare different remote options?

Check compatibility, coding method, range, battery type, response time, housing quality, and programming effort. Appearance tells very little.

Should I trust advertised operating distances?

Treat them as estimates. Real garages differ from laboratory spaces, especially during winter or with poorly aligned sensors.

What should I do if the door moves unevenly?

Stop testing immediately. Harsh sounds, unexpected reversal, or uneven movement may indicate a mechanical problem requiring qualified service.

Is programming a remote enough for safe operation?

No. Test the wall control, safety sensors, manual release, and reversal function. Remote setup does not replace inspection.

Conclusion

This guide explains How to program a sectional overhead door remote safely and effectively, beginning with the main remote types, opener systems, and compatibility factors to consider. It covers how to prepare the remote, door opener, power supply, and safety equipment before starting. Readers will learn a clear step-by-step programming process, including locating the learn or pairing control, synchronizing the remote, and confirming that the signal has been accepted.

The article also describes how to test remote operation from a safe position and troubleshoot common issues such as failed pairing, weak batteries, limited range, or inconsistent door response. Finally, it compares China’s top 10 sectional door remote options by practical factors including compatibility, operating range, durability, ease of programming, security features, and overall value. The comparison is designed to help users select a suitable remote while encouraging responsible installation, routine inspection, and safe operation.

Madeline

Madeline

Madeline is a dedicated marketing professional with a wealth of expertise in our company's core offerings. With a keen understanding of the industry, she brings a unique perspective to her role, consistently delivering high-quality content that highlights the superior aspects of our products. As......